Labubu ice cream cake is more than just a dessert—it’s a magical experience born from imagination and a lifelong love of puddings. I’m Mary, affectionately known in Bath as “The Pudding Lady,” and this delightful creation represents everything I believe a sweet should be: playful, nostalgic, and just a little bit unexpected.
In this guide, I’ll show you how to make your own Labubu ice cream cake, how to keep it fresh, how to soften it just right, and how long it lasts—plus tips for making every slice a moment of delight.
Table of Contents
Table of Contents
What is a Labubu Ice Cream Cake?
Understanding the Origins of Labubu Cake
To truly appreciate the appeal of a Labubu ice cream cake, we need to start with the character itself. Labubu is a quirky little figure from the “The Monsters” series, part of the POP MART collectibles loved by fans around the world. Known for its mischievous smile and playful appearance, Labubu has inspired themed toys, illustrations, and yes—desserts.
This trend has evolved from cute character cakes to a new favorite: the Labubu ice cream cake. It’s not just another cartoon cake—it’s a fusion of adorable character design and frozen dessert innovation.
Print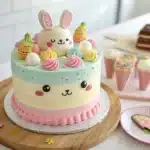
Labubu Ice Cream Cake
- Total Time: 25 minutes (plus freezing time)
- Yield: 10 servings 1x
Description
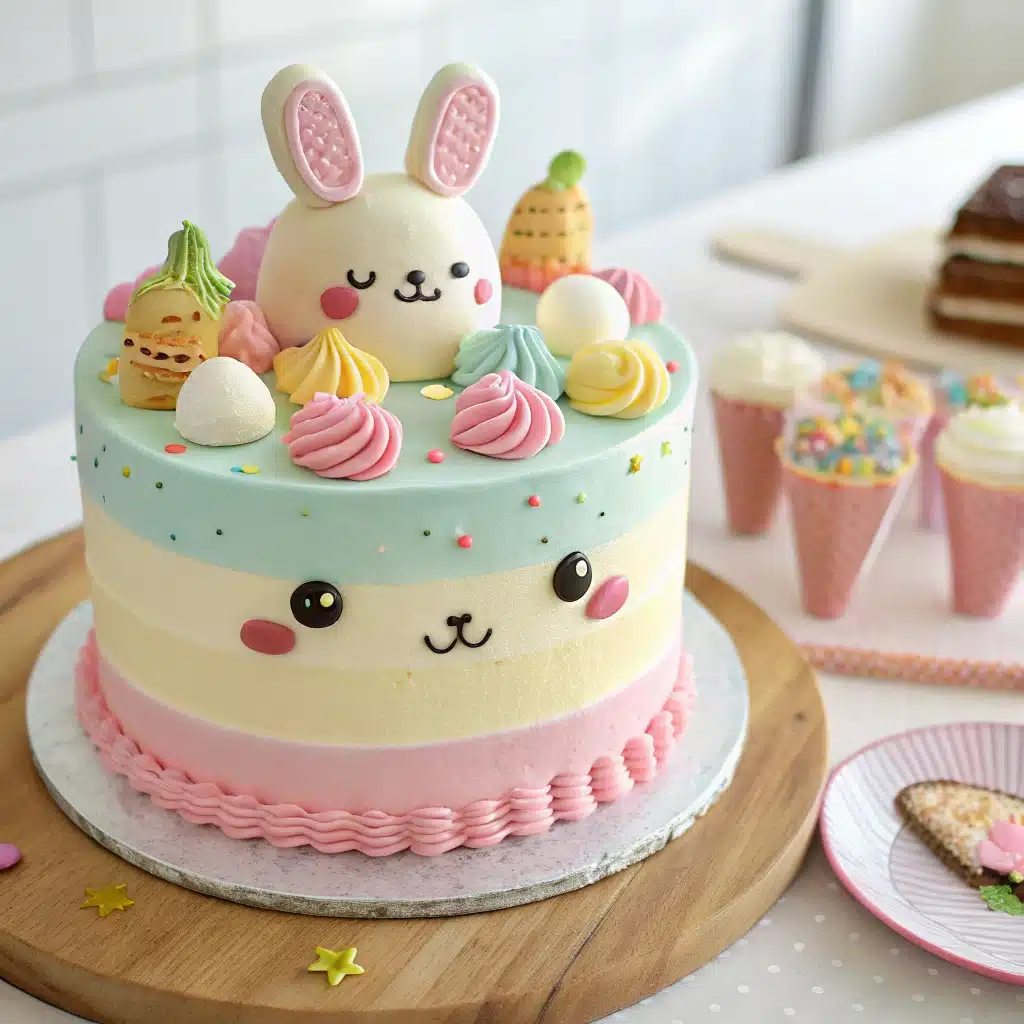
A whimsical ice cream cake inspired by Labubu, layered with cake, creamy ice cream, and playful decorations kids will adore.
Ingredients
- 1 store-bought or homemade sponge cake (8-inch round)
- 1 quart vanilla ice cream, softened
- 1 quart chocolate ice cream, softened
- 1 cup whipped topping
- Food coloring (optional)
- Decorative candies, sprinkles, or fondant for Labubu details
- Parchment paper
- Springform pan
Instructions
- Line a springform pan with parchment paper.
- Slice the sponge cake in half horizontally. Place one layer at the bottom of the pan.
- Spread a layer of softened vanilla ice cream evenly over the cake.
- Add the second cake layer and spread chocolate ice cream on top.
- Smooth the top and freeze for 4–6 hours or overnight.
- Once set, remove from pan and frost with whipped topping.
- Add food coloring or fondant features to decorate the cake as Labubu.
- Return to freezer until ready to serve.
- Let sit at room temperature for 5–10 minutes before slicing.
Notes
Create Labubu’s face using chocolate chips, fondant shapes, or edible markers for a fun themed presentation.
- Prep Time: 25 minutes
- Cook Time: 0 minutes
- Category: Dessert
- Method: Freezing
- Cuisine: Creative
Nutrition
- Serving Size: 1 slice
- Calories: 360
- Sugar: 28g
- Sodium: 180mg
- Fat: 18g
- Saturated Fat: 10g
- Unsaturated Fat: 7g
- Trans Fat: 0g
- Carbohydrates: 42g
- Fiber: 1g
- Protein: 5g
- Cholesterol: 45mg
How Ice Cream Became a Key Ingredient
Cakes with ice cream aren’t new, but combining character cakes with ice cream layers adds a delightful twist. Ice cream brings a melt-in-your-mouth texture that traditional cake simply can’t offer. Plus, it allows for bold flavors like strawberry cheesecake, cookies and cream, or matcha swirl—perfect for representing Labubu’s whimsical style.
The result? A dessert that not only looks magical but delivers a cool surprise with every bite.
Differences Between Regular and Labubu Ice Cream Cakes
Here’s how a Labubu ice cream cake stands out from typical frozen cakes:
| Feature | Regular Ice Cream Cake | Labubu Ice Cream Cake |
|---|---|---|
| Theme | Generic or simple | Based on Labubu character design |
| Decoration | Basic toppings | Cartoon-style features and colors |
| Flavor Layers | 1-2 layers | 3+ creative flavor combos |
| Visual Appeal | Minimal | High – Instagram-worthy |
| Audience | General | Popular with kids & pop art fans |
This cake isn’t just dessert—it’s edible art.
Ingredients
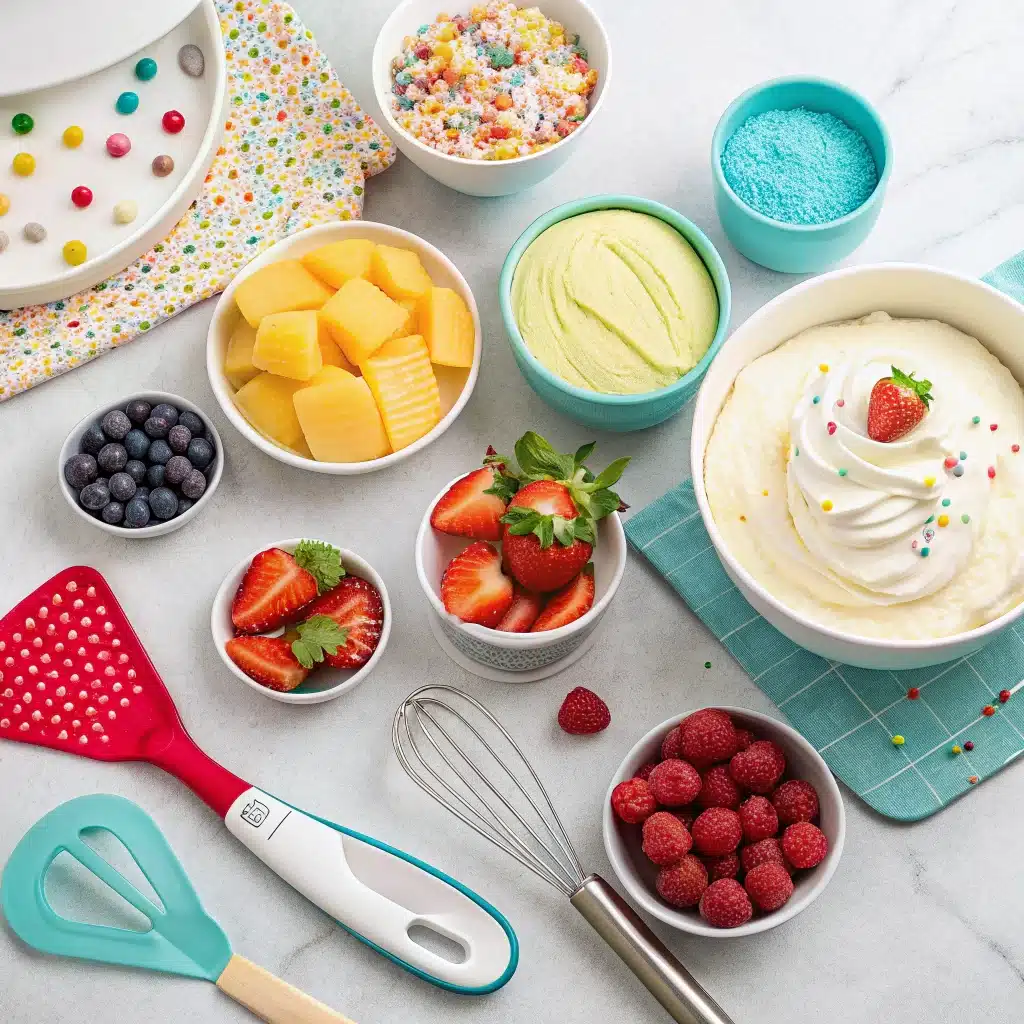
Making a Labubu ice cream cake at home doesn’t need a pro kitchen—just a few clever steps to keep things simple and enjoyable. Here’s everything you’ll need to get started.
Key Ingredients for Labubu Ice Cream Cake
To bring this playful dessert to life, you’ll need a combination of cake, ice cream, and colorful decorations. Below is a basic ingredient checklist that works for most versions:
For the Base Layer (Cake or Crust)
- Chocolate sponge cake or vanilla cake layer
- Oreo or graham cracker crust (for no-bake option)
- Unsalted butter (if using a crumb crust)
For the Ice Cream Layers
- Vanilla ice cream (base flavor)
- Strawberry or raspberry sorbet (adds color and tang)
- Cookies & cream or matcha swirl for contrast
- Food coloring (pastel shades like pink, blue, or green)
For Decorations & Labubu Details
- Whipped cream or buttercream (for borders)
- Fondant or modeling chocolate (to shape Labubu features)
- Candy eyes or edible image toppers
- Sprinkles, chocolate chips, mini marshmallows
Don’t miss our delightful Chocolate Raspberry Cake for ideas on bold flavor combos that work great in layered cakes like this!
Recommended Kitchen Tools and Equipment
While making an ice cream cake sounds fancy, you don’t need to be a pro baker to pull it off. These tools will make your life easier:
- 8-inch springform pan or cake ring
- Parchment paper
- Silicone spatula
- Offset cake spatula (for smoothing layers)
- Piping bags and tips (for decorations)
- Freezer-safe cake board or tray
- Food-safe gloves (for working with fondant or shaping)
Having these handy ensures your cake comes out neat and ready for decorating.
Ingredient Substitutions for Vegan or Gluten-Free Versions
Want to make your Labubu ice cream cake more inclusive? No problem. Here are easy swaps:
| Traditional Ingredient | Vegan/Gluten-Free Alternative |
|---|---|
| Dairy-based ice cream | Coconut milk or almond milk ice cream |
| Regular cake base | Gluten-free sponge or almond flour crust |
| Butter for crust | Vegan butter or coconut oil |
| Whipped cream for decor | Dairy-free whipped topping |
| Food coloring | Natural plant-based colorants (beets, spirulina) |
Discover great ideas like this in our Vegan & Gluten-Free Cupcakes recipe guide!
With these swaps, everyone at your party can enjoy a slice—no matter their dietary needs.
Step-by-Step Recipe Guide
This is where your Labubu ice cream cake comes to life. Whether you’re making it for a birthday, a summer party, or just because—this simple step-by-step guide will walk you through the process from scratch.
Preparing the Cake Base (Sponge or Cookie Crust)
Before anything else, decide: do you want a sponge cake base or a no-bake cookie crust?
Option 1: Sponge Cake Base
- Preheat your oven to 350°F (175°C).
- Line the bottom of an 8-inch round cake pan with parchment paper.
- Prepare your favorite vanilla or chocolate cake batter.
- Bake for 20–25 minutes, then allow to cool fully before assembling the layers.
Option 2: Cookie Crust Base
- Pulse 20–25 Oreos or graham crackers in a food processor until finely crushed.
- Combine with 5 tablespoons of melted butter and mix until the texture is crumbly and holds together.
- Press the mixture firmly into the bottom of a springform pan to form an even crust.
- Chill in the freezer for 15 minutes to set.
Don’t miss our Vanilla Cake Recipe if you need a from-scratch sponge option!
Making the Labubu-Themed Ice Cream Layers
Here comes the fun part—layering your flavored and colored ice cream to match the adorable Labubu aesthetic.
Step 1: Soften Your Ice Cream
Let your first flavor (e.g., vanilla) sit out for about 10 minutes. It should be scoopable but not melted.
Step 2: First Layer
- Evenly spread the softened vanilla ice cream over the prepared crust layer.
- Smooth the surface with an offset spatula.
- Freeze for 30–45 minutes until firm.
Step 3: Add Color & Second Flavor
- Soften strawberry or raspberry sorbet.
- Optionally mix in pink food coloring for a bright Labubu vibe.
- Spread on top of the frozen vanilla layer.
- Freeze again for 30–45 minutes.
Step 4: Final Layer
- Use cookies & cream or matcha swirl as the top layer.
- Decorate with cookie chunks, mini marshmallows, or fun mix-ins.
- Freeze the entire cake for at least 4 hours (or overnight) before decorating.
💡 Tip: Use a spoon dipped in hot water to smooth layers for that perfect finish.
Final Assembly and Freezing Tips
Once your layers are set, it’s time to prep for the finishing touches:
- Remove the springform ring and parchment.
- Trim rough edges with a warm knife for clean sides.
- Chill the cake in the fridge for 10 minutes before decorating to prevent condensation buildup.
Looking for something fun to sip with this cake? Check out our refreshing Rose Milk Tea—perfect pairing for summer parties.
Decorating Your Labubu Ice Cream Cake
Decorating your labubu ice cream cake is where magic happens—where this frozen treat transforms from delicious to unforgettable. Whether you’re making it for a birthday, a themed party, or just because you’re obsessed with cute desserts, these decorating methods bring Labubu to life in the most adorable way.
How to Create the Labubu Character on Your Cake
Adding Labubu’s quirky charm to your labubu ice cream cake is easier than you think. Here are three simple ways to do it:
Option 1: Edible Printed Topper (Fast & Cute)
- Order a Labubu character image printed on edible paper.
- Finish the top of your ice cream cake with a smooth layer of whipped cream or white fondant.
- Gently press the topper over the surface for instant cartoon flair.
Option 2: Fondant Decorations (Fun & Flexible)
- Roll out pink, white, and black fondant to craft Labubu’s ears, face, and signature smile.
- Add personality with fondant cheeks, cartoon eyebrows, and tiny fangs.
- This approach gives your labubu ice cream cake a 3D, sculpted look.
Option 3: Hand-Piped Labubu Face (For the Artists)
- Pipe Labubu’s face directly onto the cake using buttercream or stabilized whipped cream.
- Outline with a small round piping tip, then fill in color details.
- Freeze in between steps to prevent smudging your design.
Don’t miss our Mini Chocolate Cakes for other frosting and piping inspirations.
Frosting Options: Buttercream, Whipped Cream, and More
Every labubu ice cream cake needs the right frosting. Not just for looks—but also for freezer stability and taste. Here’s what works best:
| Frosting Type | Why It Works For Ice Cream Cakes | Best Use Case |
|---|---|---|
| Whipped Cream | Light and airy, ideal for frozen textures | Classic pastel designs |
| Stabilized Whip | Holds shape longer without melting fast | Summer parties, humid days |
| Buttercream | Perfect for piping Labubu details | Character outlines and borders |
| Vegan Whipped Topping | Plant-based and freezer safe | Dairy-free cake versions |
💡Pro Tip: Chill your tools before piping. It helps with clean lines on your ice cream layers.
Using Edible Toppers, Sprinkles, and Coloring
The beauty of a labubu ice cream cake lies in its details. Adding textures, sprinkles, and playful toppings brings this frozen cake to life—just like Labubu’s energetic personality.
Use These for Extra Visual Pop:
- Sprinkles: Add pastel stars, moons, or vibrant dots to give your cake a playful, toy-inspired look
- Chocolate Shavings: Add contrast and flavor around the cake’s bottom edge
- Marshmallows: Make clouds or use as Labubu’s cheeks
- Colored Piping Gel: Outline Labubu’s big smile and mischievous eyes
You can even tint ice cream layers in soft pinks, greens, or purples to match Labubu’s whimsical theme.
Looking for inspiration? Try our Apple Jack Cereal Treat—a perfect example of how to add playful, colorful crunch to desserts.
Freezer-Friendly Decoration Tips for Labubu Ice Cream Cake
Decorating a frozen dessert like this isn’t the same as working on a traditional cake. Here’s how to make sure your labubu ice cream cake looks perfect from freezer to table:
- Work in Chilled Intervals: Keep the cake frozen between each stage of decorating
- Avoid Condensation: Decorate in a cool, dry environment to prevent colors from running
- Set Fondant Fast: Place fondant details while the cake is firm so they stick better
- Freeze After Finishing: Flash freeze for 15–20 minutes before serving to set everything
Decorating a labubu ice cream cake should be as joyful as eating it. Whether you go simple or sculpted, there’s no wrong way to bring this playful dessert to life.
Serving and Storing Tips
You’ve built, layered, and decorated your masterpiece—now comes the critical part: keeping your labubu ice cream cake in perfect condition until it’s time to shine. Serving and storage might not sound glamorous, but they can make or break the cake’s final moment.
Best Ways to Cut and Serve Ice Cream Cake
Cutting an ice cream cake is a bit different than slicing into a regular one. The key? Timing and tools.
Pro Tips for Clean Slices:
- Remove your labubu ice cream cake from the freezer 10–15 minutes before serving.
- Use a long, sharp knife and dip it in warm water between cuts.
- Wipe the blade clean with a towel after each slice to keep edges sharp.
💡 Want neat presentation for parties? Cut the cake into pre-portioned squares and top each with a mini Labubu fondant topper.
Storage Advice: Freezer, Cooler, or Fridge?
If you’re wondering how to store your labubu ice cream cake overnight or during transport, here’s what you need to know:
| Storage Method | Duration | Tips for Best Results |
|---|---|---|
| Freezer | 5–7 days | Wrap in plastic + foil to prevent freezer burn |
| Cooler w/ Ice Packs | Up to 4 hours | Use dry ice for longer events or travel |
| Refrigerator | 30–45 minutes | ONLY to soften before serving—not for storage |
Learn more about other frozen cake-friendly options in our Chocolate Raspberry Cake—a great make-ahead dessert idea.
How to Transport Ice Cream Cake Without Melting
Taking your labubu ice cream cake to a party, event, or picnic? Avoid a melted mess with these smart hacks:
Transport Like a Pro:
- Use a hard-sided cooler filled with frozen gel packs or dry ice.
- Place your cake on a frozen metal baking sheet to hold temperature longer.
- Wrap the entire cake box in aluminum foil for insulation.
- If traveling over 2 hours, bring a backup topping kit in case of minor smudges.
💡Pro Move: Transport the cake without decorations and apply the final Labubu touches onsite for a flawless presentation.
Labubu Ice Cream Cake Variations
While the classic labubu ice cream cake typically uses soft pastel colors and kid-friendly flavors like vanilla and strawberry, you can totally switch things up to suit your taste, occasion, or dietary needs. Here are some creative twists you’ll want to try.
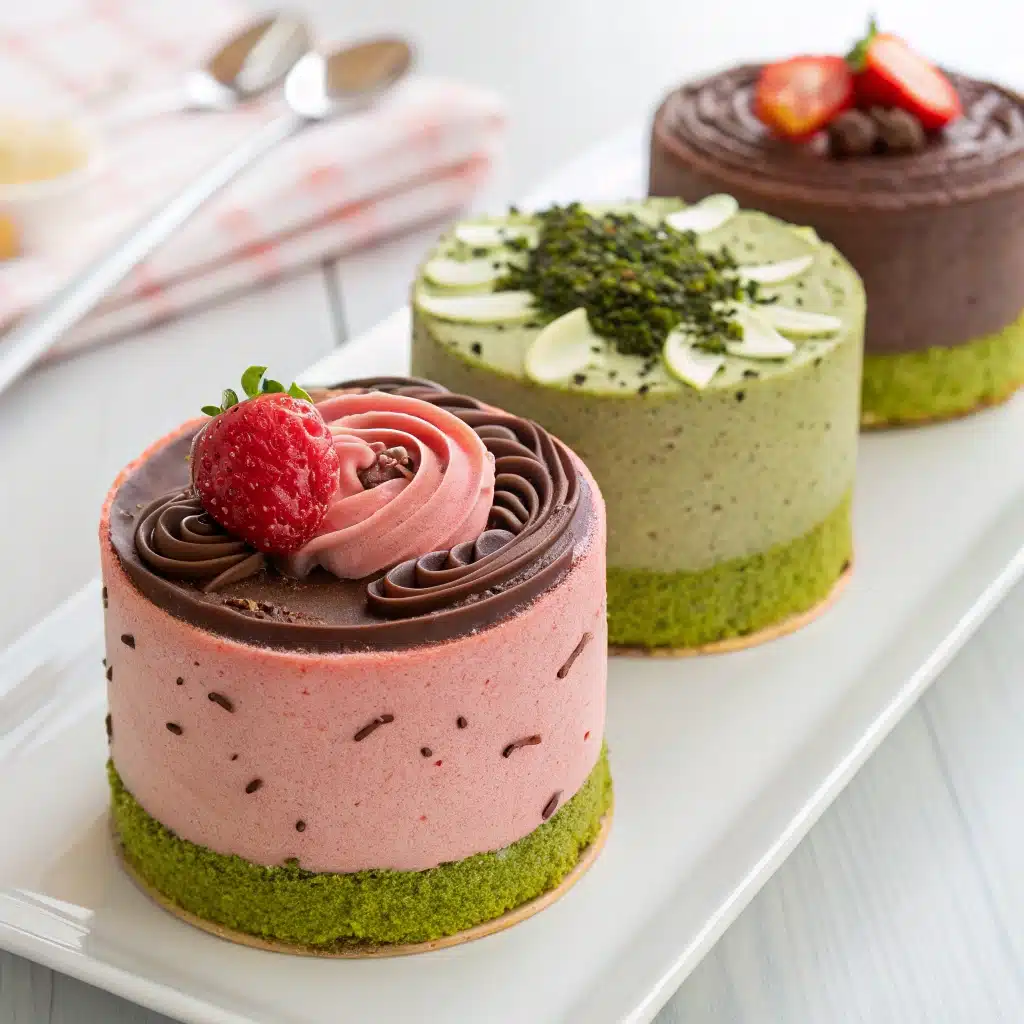
Chocolate, Matcha, and Strawberry Versions
These flavor combos not only taste amazing—they also match Labubu’s playful personality. Here’s how to mix things up:
Chocolate Labubu Ice Cream Cake
- Base: Chocolate sponge cake or Oreo crust
- Layers: Layers include fudge ripple, chocolate chip, and cookies & cream for a decadent, multi-flavored treat
- Decoration: Dark chocolate shavings, piped chocolate buttercream
- Bonus: Add mini chocolate truffles for texture
Matcha Labubu Ice Cream Cake
- Base: Almond shortbread crust
- Layers: Matcha, vanilla bean, and black sesame ice cream
- Decoration: Green whipped cream, edible flowers, and matcha drizzle
- Perfect for: Tea lovers and modern themed parties
Strawberry Shortcake Labubu Ice Cream Cake
- Base: Vanilla cake with strawberry syrup
- Layers: Strawberry, vanilla, and strawberry cheesecake
- Decoration: Top with sliced fresh berries, pink sprinkles, and a fondant Labubu figure for a charming finish
Looking for a balanced fruity-nutty twist? Try our Vegan Pistachio Cake for flavor pairing inspiration!
Seasonal Ideas (Halloween, Christmas, Birthday Themes)
Make your labubu ice cream cake the star of any holiday or celebration with themed details:
🎃 Halloween Labubu Cake
- Use orange-tinted vanilla ice cream and black chocolate laCreate contrast with orange-tinted vanilla ice cream and rich black chocolate layers
- Add candy eyeballs and spiderweb piping
- Make Labubu wear a fondant witch hat
🎄 Christmas Labubu Cake
- Mix peppermint ice cream with red velvet cake base
- Decorate with crushed candy canes, mint leaves, and snowflake sprinkles
- Give Labubu a Santa hat or scarf
🎉 Birthday Labubu Cake
- Customize colors to match the party theme
- Add a mini “Happy Birthday” banner and candles
- Finish with generous swirls of whipped cream and a shower of rainbow sprinkles
Kid-Friendly and Adult Versions
Everyone can enjoy a labubu ice cream cake, but tailoring it to your audience makes it even better.
| Version | Features | Best For |
|---|---|---|
| Kid-Friendly | Bright colors, mild flavors (vanilla, strawberry), cartoon décor | Children’s parties |
| Adult-Friendly | Sophisticated combos (matcha, espresso, tiramisu), subtle design | Brunch, showers, work events |
Want something rich and mature for grown-ups? Try adapting from our Tiramisu Cake Recipe and give Labubu a coffee-flavored twist!
The best part about making a labubu ice cream cake is the freedom to personalize it. From classic to crazy, every version tells its own delicious story.
Troubleshooting Common Mistakes
Even the most magical labubu ice cream cake can go sideways if you’re not prepared. But don’t worry—these common problems are easy to fix with a few expert hacks. Let’s tackle the most frequent issues so you can serve a flawless frozen masterpiece.
Why Your Ice Cream Cake May Be Too Hard or Too Soft
When it comes to serving an ice cream cake, timing is key for the perfect slice and texture. Here’s what to do when the texture just isn’t right:
Problem: Too Hard to Slice
- ❌ You just pulled it from the freezer and it’s rock solid
- ✅ Fix: Let the cake sit at room temp for 10–15 minutes before slicing
- ✅ Dip your knife in hot water, then dry before each cut
Problem: Melting Too Quickly
- ❌ The kitchen is too warm or you waited too long to serve
- ✅ Fix: Chill plates before serving and keep the cake in the freezer until the last minute
- ✅ Consider using stabilized whipped cream for decorations that resist drooping
Don’t miss our Tuxedo Cake guide—it includes tips for handling multi-layered cakes under warm conditions.
Dealing with Melting or Collapsing Layers
Layering is the heart of a good labubu ice cream cake—but when one layer slides or melts unevenly, it can look messy.
Problem: Uneven or Slipping Layers
- ❌ Ice cream wasn’t fully set before adding the next layer
- ✅ Fix: Always freeze each layer for at least 30–45 minutes before adding the next one
- ✅ Press lightly and level each layer with a spatula
Problem: Cake Collapsing or Leaning
- ❌ Cake base wasn’t firm or level
- ✅ Fix: Use a cake board or flat plate; freeze the entire structure overnight before final decoration
- ✅ Avoid stacking more than 3 ice cream layers unless fully supported
How to Fix Cracks or Uneven Surfaces
Even a picture-perfect labubu ice cream cake can develop cracks or rough edges. Here’s how to save the day:
Problem: Cracks on the Surface
- ❌ Ice cream expanded or dried out
- ✅ Fix: Cover small cracks with extra whipped cream or sprinkles
- ✅ Wrap the cake tightly in plastic and foil to lock in moisture and prevent drying out
Problem: Uneven Top or Smudged Decorations
- ❌ You decorated too soon or moved the cake while soft
- ✅ Fix: Let the cake set for 15 minutes in the freezer before adding final touches
- ✅ Use an offset spatula to smooth any imperfections
💡 Bonus Tip: Pipe extra whipped cream borders to hide any sides that didn’t unmold cleanly. Adds both beauty and structure.
For more advice on assembling delicate frozen cakes, explore our Pistachio Olive Oil Cake with layering tips.
No cake disaster is beyond repair—especially with a little creativity. Knowing these quick fixes can turn your labubu ice cream cake from “uh-oh” to “OMG” in minutes.
Conclusions
A labubu ice cream cake isn’t just a treat—it’s an experience. From the playful layers of ice cream and creative decorating options to the joy of seeing Labubu’s mischievous face come to life, this cake turns any occasion into something magical.
Whether you go for strawberry and vanilla layers with sprinkles or matcha and chocolate with sculpted fondant art, the beauty of this dessert is its versatility. Plus, it’s freezer-friendly, fun to make, and guaranteed to wow your guests.
Looking to explore even more sweet inspiration? Don’t miss our whimsical Lemon Blueberry Mini Bundt Cakes or our rich Chocolate Espresso Cake for other crowd-pleasing bakes.
Whatever the occasion, your labubu ice cream cake is more than just dessert—it’s a memory waiting to be made.
Fore more recipes follow me in Facebook, medium and Pinterest
FAQs
How long will an ice cream cake last?
A labubu ice cream cake will last up to 7 days in the freezer if stored properly. Be sure to wrap the entire cake tightly in plastic wrap and then again in aluminum foil to prevent freezer burn and flavor loss.
If you’ve already cut into it, cover any exposed slices with parchment or wax paper before re-wrapping.
Bonus tip: For longer-lasting flavor, avoid storing the cake near strongly scented foods like onions or fish.
Will an ice cream cake keep in a cooler?
Yes, your labubu ice cream cake can be kept in a cooler with ice packs or dry ice for up to 4 hours, depending on the outdoor temperature and type of insulation.
For best results:
Use dry ice for long drives or outdoor parties
Wrap the cake in foil and place inside a hard-sided cooler
Keep the cooler in shade and limit how often it’s opened
This is the ideal method for taking your cake to a birthday party, park, or picnic.
How long to leave ice cream cake out to soften?
You should leave your labubu ice cream cake out at room temperature for about 10–15 minutes before cutting. This softens the ice cream just enough to slice easily without melting the cake structure.
Pro tip:
Set a timer to avoid forgetting and ending up with a puddle
Use a warm knife (dip in hot water) for smooth, clean cuts
How long does ice cream cake need to thaw?
If your labubu ice cream cake has been in deep freeze or is very dense (with thick layers), let it thaw in the fridge for 30–45 minutes before serving.
This gentle thawing helps preserve decorations while softening the inside:
Keep the cake in its box or covered while thawing
Don’t let it sit in the sun—this can cause rapid, uneven melting
Don’t miss our Chocolate and Pistachio Cake for tips on layering dense desserts that slice beautifully.