I’m Mary, I live in Bath, where the roses bloom early, and I’m known (proudly) as “The Pudding Lady.” And today, let me introduce you to something very close to my heart—Salted Chocolate Cake. It’s not just a recipe; it’s an expression of my pudding philosophy. Pudding isn’t just the end of a meal. It’s the moment your guests remember, the reason they linger at the table, and maybe even the thing they mention the next day.
This recipe was born in my childhood pantry, where chocolate buttons were snuck during baking and the tin of sea salt lived right beside the flour. I learned early that salt, used well, could lift sweetness to impossible heights. And when paired with deep, rich chocolate—it was nothing short of miraculous.
I’ve baked for decades. Victoria sponges with jam tumbling out, treacle puddings that shimmer like polished chestnuts, and sponge rolls so airy they nearly floated off the plate. But my Salted Chocolate Cake—that’s the one people ask about. It’s rich but not heavy, deeply chocolatey, with just enough salt to make you raise your eyebrows and say, “Wait, what was that?”

Table of Contents
Table of Contents
hy Salted Chocolate Cake Is So Popular
The Sweet-Salty Flavor Trend
Sweet and salty desserts have taken the culinary world by storm—and for good reason. Salt doesn’t just stand on its own; it enhances and sharpens sweet flavors, especially in rich foods like chocolate. When added in moderation, sea salt gives chocolate depth and complexity, allowing different flavor notes to shine. Think of it like turning up the contrast on a photo—everything becomes more vivid.
Salted caramel brought this trend into the spotlight, but salted chocolate cake has carved out its own niche. It’s no longer just a novelty; it’s a standard on upscale bakery menus, food blogs, and home kitchens.
What makes this trend so appealing? It’s the flavor contrast. Salt tempers sweetness and stimulates the taste buds, making each bite feel more exciting than the last. A little pinch of flaky sea salt on top of a gooey chocolate ganache is like the cherry on top—but better.
Print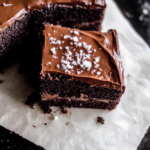
Salted Chocolate Cake A Decadent Delight With a Hint of Salted Magic
- Total Time: PT55M
- Yield: serves 8–10 1x
Description
Salted chocolate cake made easy. Discover the best rich & moist recipe with ganache
Ingredients
Cake:
3/4 cup (1 1/2 sticks) unsalted butter, melted, plus extra for the pans
1 1/2 cups unsweetened cocoa powder, plus extra for the pans
2 cups all-purpose flour
1 1/2 cups granulated sugar
1/2 cup packed light brown sugar
2 teaspoons baking soda
1 teaspoon baking powder
1 teaspoon kosher salt
4 large eggs, beaten
1 cup sour cream
1 tablespoon instant espresso
Frosting:
1 1/4 cups (2 1/2 sticks) unsalted butter, softened
3 cups confectioners’ sugar
2/3 cup unsweetened cocoa powder
3 tablespoons heavy cream
1 teaspoon pure vanilla extract
1/2 teaspoon kosher salt
1 1/4 teaspoons flake salt
Instructions
1- For the cake: Preheat the oven to 350 degrees F. Butter the inside of two 9-inch round cake pans. Line the bottoms with parchment paper and butter that as well. Dust with cocoa powder, being sure to tap out the excess. Set aside.
2- Whisk together the cocoa, flour, granulated sugar, brown sugar, baking soda, baking powder and salt in a large bowl until there are no large lumps. Make a well in the center of the dry ingredients and add the eggs, melted butter, sour cream, instant espresso and 1 1/2 cups water. Slowly start to work everything together, adding the dry to the wet ingredients as you go until everything is combined and you have a smooth batter. Do not over mix. Divide evenly in the prepared cake pans and bake until a cake tester inserted in the center comes out clean, about 40 minutes. Allow to cool for 10 minutes in the pans. Unmold onto a wire rack and cool completely.
3- For the frosting: Beat the butter in a medium bowl on medium speed using a hand-held mixer until light and fluffy. Add the confectioners’ sugar, cocoa powder, heavy cream, vanilla and kosher salt and continue to beat on medium speed until light, fluffy and creamy.
4- Place one layer of cake on a plate or cake stand. Spread one-quarter of the frosting on the cake evenly all the way to the sides using a small offset spatula. Place the other layer of cake on top and press gently. Spoon the remaining frosting on top and spread evenly, pushing the frosting over the edge and spreading it around the sides. Refrigerate for at least 30 minutes before serving. Sprinkle the top evenly with the flake salt to serve.
Notes
Calories may vary based on chocolate type and amount of frosting used.
Using oil instead of butter increases unsaturated fat while keeping the cake moist.
Adding salted caramel or toppings like nuts will raise fat, sugar, and calorie counts.
For a vegan or gluten-free version, the values shift slightly depending on substitutions.
- Prep Time: PT20M
- Cook Time: PT35M
- Category: Dessert
- Cuisine: American
Nutrition
- Calories: 450–500 kcal
- Sugar: 35g
- Sodium: 290mg
- Fat: 26g
- Saturated Fat: 11g
- Carbohydrates: 54g
- Fiber: 3g
- Protein: 5g
- Cholesterol: 55mg
Psychology Behind Salt in Sweets
It’s not just your taste buds that are into salted desserts—your brain is, too. Studies show that the sweet-salty combo stimulates the brain’s reward center, triggering a stronger pleasure response. That’s part of why we crave chocolate-covered pretzels or salted caramel everything.
In baking, salt is traditionally used in small amounts to round out sweetness and enhance richness. In salted chocolate cake, it goes a step further—becoming a bold, intentional flavor. The salt isn’t just a background note; it’s a headliner. And when done right, it creates a layered, gourmet dessert experience without requiring complicated ingredients.
This is why a salted chocolate cake isn’t just a trend. It’s a modern classic, offering complexity, balance, and a hit of nostalgia—everything a great dessert should be.
Choosing the Right Ingredients for Salted Chocolate Cake
A flawless salted chocolate cake starts with quality ingredients. From the type of chocolate you choose to the salt that finishes the dish, every component plays a role in the final flavor. Let’s break down the must-haves—and why they matter.
Best Chocolate Types: Dark, Semi-Sweet, or Milk?
When it comes to salted desserts, not all chocolates are created equal. The bold richness of chocolate needs to stand up to the sharp, contrasting flavor of salt. Here’s how to pick the right kind:
| Chocolate Type | Cocoa Content | Flavor Profile | Best For |
|---|---|---|---|
| Dark Chocolate | 60–75% | Bold, bitter-sweet | Rich, elegant cakes |
| Semi-Sweet | 50–60% | Balanced, versatile | Classic chocolate cakes |
| Milk Chocolate | 30–40% | Sweet, mellow | Frostings and add-ins |
Dark chocolate is usually the top pick for a classic salted chocolate cake. Its depth pairs beautifully with flaky sea salt, creating that indulgent, grown-up flavor combo. Semi-sweet chocolate is a close second if you want a slightly sweeter bite without going full milk chocolate.
Looking for inspiration? Try this vanilla cake with raspberry filling to explore how fruit contrasts can also elevate cake flavors.
Why Sea Salt Makes a Difference
Salt isn’t just salt. If you’ve been sprinkling table salt on your desserts, it’s time to upgrade.
Here are the types of salt commonly used in baking—and why one reigns supreme in salted chocolate cake:
| Salt Type | Texture | Flavor Impact | Best Used For |
|---|---|---|---|
| Table Salt | Fine | Harsh, too salty | Not recommended |
| Kosher Salt | Coarse | Mild, clean flavor | Mixing into batter |
| Sea Salt Flakes | Delicate | Crunch + flavor burst | Garnishing tops |
Flaky sea salt like Maldon or fleur de sel is your best bet for finishing a cake. It dissolves slowly, giving you little hits of saltiness that enhance the richness of the chocolate without overpowering it. If you’re mixing salt into your batter, use a high-quality kosher salt for even dispersion.
Salt also subtly tightens gluten structures, helping balance moisture and density. The result? A cake that’s not just flavorful but perfectly textured.
How to Make a Moist Salted Chocolate Cake

No one wants a dry cake—especially not a decadent salted chocolate cake. Moisture is what gives cake that luscious, melt-in-your-mouth texture. But getting it right requires a combination of smart ingredient choices and solid technique. Here’s how to lock in that rich, velvety finish every time.
Moisture Retention: Key Ingredients to Use
The finest salted chocolate cakes are moist and tender yet hold their shape—achieving that perfect texture begins with choosing the right ingredients. Here are the moisture-boosting MVPs that bakers swear by:
| Ingredient | Why It Works |
|---|---|
| Buttermilk | Acidic and creamy, helps tenderize the crumb |
| Oil (vs. butter) | Retains moisture better at room temperature |
| Brown sugar | Contains molasses, adds softness and deeper flavor |
| Eggs | Bind, rise, and add richness all in one |
| Boiling water or coffee | Enhances cocoa flavor and ensures a moist batter |
Substituting oil for some or all of the butter is one of the best tricks to keep your cake moist for days. Buttermilk also plays a big role. Its acidity not only softens the gluten in flour, but also pairs perfectly with chocolate, enhancing its flavor.
Seeking a cake that offers a unique balance of richness and moisture? Discover this tiramisu cake for a layered approach with cream-based softness.
Mixing Techniques That Prevent Dryness
You can use the best ingredients in the world—but if your technique is off, you’ll still end up with a dry cake. These steps will help you bake with confidence:
- Don’t overmix the batter. After adding the flour, mix only until the ingredients are just combined. Overmixing can create excess gluten, leading to a dense, heavy cake.
- Use room temperature ingredients. Cold eggs and milk don’t mix well, leading to uneven batter and poor rise.
- Measure flour correctly. Spoon and level instead of scooping straight from the bag. Too much flour = dry cake.
- Bake at the right temperature. Too hot, and the outside will dry before the inside is done. Always preheat and check oven accuracy.
- Wrap while slightly warm. After cooling for 10 minutes, wrap the cake in plastic wrap to trap moisture as it finishes cooling.
Want a chocolate flavor with a creamy finish? Don’t miss our red velvet brownies for another moist dessert that nails texture and richness.
These tips apply whether you’re baking a layer cake, bundt, or cupcakes. With the right combination of ingredients and process, your salted chocolate cake will turn out tender, flavorful, and impossible to resist.
Salted Chocolate Cake Recipe – Step-by-Step
Now that you understand the “why” behind the flavors and textures, let’s get into the “how.” This salted chocolate cake recipe delivers deep chocolate flavor, balanced sweetness, and that signature hint of sea salt. It’s simple enough for novice bakers, yet elegant enough to shine at any celebration.
Ingredients List with Substitutions
Here’s everything you need to create a bakery-style salted chocolate cake at home:
For the Cake:
- 1¾ cups all-purpose flour
- ¾ cup unsweetened cocoa powder (preferably Dutch-process)
- 2 cups granulated sugar
- 1½ tsp baking powder
- 1½ tsp baking soda
- 1 tsp fine kosher salt
- 2 large eggs, room temperature
- 1 cup buttermilk (or milk + 1 tbsp vinegar)
- ½ cup neutral oil (canola or vegetable)
- 2 tsp vanilla extract
- 1 cup hot water or brewed coffee (for extra depth)
For the Ganache Frosting:
- 1 cup heavy cream
- 8 oz semi-sweet or dark chocolate, finely chopped
- 1 tbsp butter (for shine)
- Flaky sea salt (Maldon or fleur de sel), for finishing
Optional: Add a layer of salted caramel between the cake layers for extra richness.
Detailed Baking Instructions with Timing
Follow these steps to bake a moist, flavorful salted chocolate cake with ganache topping.
Step 1: Prep the Oven and Pans
- Preheat your oven to 350°F (175°C).
- Grease and line two 8-inch round cake pans with parchment paper.
Step 2: Mix the Dry Ingredients
- In a large mixing bowl, sift together flour, cocoa, sugar, baking powder, baking soda, and kosher salt.
- Whisk until combined.
Step 3: Add Wet Ingredients
- In a separate bowl, whisk together eggs, buttermilk, oil, and vanilla.
- Pour the wet mixture into the dry ingredients. Mix until smooth.
- Slowly stir in the hot water or coffee last. The batter will be thin—this is normal.
Step 4: Bake
- Divide the batter evenly between the pans.
- Bake for 30–35 minutes, or until a toothpick comes out with a few moist crumbs.
- Cool in the pans for 10 minutes, then transfer to a wire rack.
Step 5: Make the Ganache
- Heat the heavy cream in a small saucepan until just simmering.
- Pour it over the chopped chocolate and let sit for 1 minute.
- Stir until smooth, then whisk in butter.
- Allow it to cool just enough to reach a thick, spreadable consistency.
Step 6: Assemble and Frost
- Place one cake layer on a serving plate.
- Spread ganache on top. Add the second layer and cover the entire cake with ganache.
- Sprinkle flaky sea salt over the top as a finishing touch.
Don’t miss our layered vanilla cake recipe to compare textures and decorating styles for different cake types.
Pro Tip:
To boost flavor, you can make the cake layers a day ahead and wrap them tightly in plastic wrap. Frost just before serving for the best texture and taste.
Decorating and Topping Your Salted Chocolate Cake
You’ve baked the perfect salted chocolate cake—moist, rich, and flavorful. Now it’s time to make it look as good as it tastes. A beautifully decorated cake doesn’t just impress guests; it enhances the eating experience by adding new textures and flavors.
Salted Caramel Drizzle or Ganache?
Both toppings bring a luscious finish, but they offer different moods and levels of indulgence. Here’s a quick breakdown:
| Topping | Flavor Profile | Best Used For |
|---|---|---|
| Chocolate Ganache | Deep, smooth, and glossy | Rich, elegant finishes |
| Salted Caramel | Sweet with a toasty edge | Sweet-salty punch and added texture |
| Hybrid Drizzle | Ganache + caramel in ribbons | Dramatic dessert presentation |
Chocolate ganache is a classic choice. It adds polish and a melt-in-your-mouth layer of richness that complements the cocoa-heavy cake. Use an offset spatula to create smooth edges or let it drip naturally over the sides for that bakery-style look.
Salted caramel ups the contrast. Its golden color and striking salt crystals add both visual appeal and a delightful textural contrast. You can spoon it on top or pipe it between layers for extra wow.
Looking for ideas with creative finishes? Check out our tres leches cake twist for an example of decorative layering with syrup and cream.
Garnishing Ideas: Flakes, Fruits, and More
Adding the right garnish turns your cake into a showstopper. Here are a few decoration ideas that balance flavor, color, and texture:
- Flaky Sea Salt – A final sprinkle enhances the sweet-salty balance and looks artisanal.
- Chocolate Curls or Shavings – Use a vegetable peeler on a chocolate bar for instant elegance.
- Fresh Berries – Raspberries or strawberries add tart contrast and vibrant color.
- Edible Gold Leaf or Dust – For special occasions, a hint of shimmer elevates the presentation.
- Toasted Nuts – Almonds or hazelnuts give a bit of crunch and rustic charm.
You can mix and match toppings for a unique creation that reflects your style. Just don’t overload the top—let the chocolate and salt shine through.
Don’t miss our chocolate raspberry cake for inspiration on pairing garnishes and frostings to highlight different chocolate flavors.
Troubleshooting Common Salted Chocolate Cake Problems
Even experienced bakers hit snags when making a decadent salted chocolate cake. A sunken center, dry edges, or grainy ganache can turn an anticipated dessert into a letdown. The good news? Every issue has a fix—and most are easy to prevent once you know what to look for.
Why Does Chocolate Sink in Cakes?
If your chocolate chips or chunks end up at the bottom of your cake, you’re not alone. Here’s why it happens—and how to keep those morsels evenly distributed:
| Cause | Fix |
|---|---|
| Batter too thin | Fold in chopped chocolate once batter is mixed and let it sit for 5 minutes to thicken slightly. |
| Heavy chocolate pieces | Toss add-ins with 1 tbsp of flour before adding to batter. |
| Oven temp too low at start | Preheat properly to ensure instant lift from leaveners. |
To keep mix-ins suspended, you need a batter with enough structure. Avoid overmixing or overheating your batter, both of which can break down stability.
Avoiding Cracks and Uneven Texture
You want your salted chocolate cake to be picture-perfect, not sunken or domed with a crater in the middle. Here are some of the most frequent issues and how to fix them:
| Problem | Likely Cause | Solution |
|---|---|---|
| Cracked top | Oven temperature too high | Use an oven thermometer to ensure accuracy. |
| Dry edges | Overbaking or thin batter | Bake just until a toothpick comes out mostly clean. |
| Gummy or wet center | Undermixing or underbaking | Check doneness with a skewer and rotate pans if needed. |
| Dense or rubbery crumb | Overmixed batter or too much flour | Stir only until dry ingredients disappear. |
Want to explore more creative chocolate recipes? Discover great ideas like our tiramisu cookies for alternative dessert textures and bold flavors.
Pro Tips to Nail the Texture Every Time:
- Use parchment paper to line pans—this prevents sticking and uneven baking.
- Let the cake cool before frosting. Warm cake can melt ganache or frosting, creating a greasy texture.
- Sifting dry ingredients helps eliminate lumps and promotes even mixing for a smoother, more consistent batter.
Every baker hits bumps in the road, but the more you understand the science behind the cake, the easier it is to fix or avoid problems altogether. With these troubleshooting tips, your salted chocolate cake will rise, bake, and taste just right.
How to Store Salted Chocolate Cake Properly
So you’ve baked the perfect salted chocolate cake—moist, rich, beautifully frosted. But what happens when there are leftovers? Or if you want to make the cake ahead of time? Storing it the right way helps maintain that fresh-from-the-oven taste for days.
Room Temp vs Refrigeration: What’s Best?
Where you store your cake depends on how long you plan to keep it—and what’s in it.
| Storage Method | Best For | Shelf Life |
|---|---|---|
| Room Temperature | Unfrosted cake or cake with ganache | 2–3 days (covered) |
| Refrigeration | Frosted cakes, especially with cream | 4–6 days (airtight) |
| Freezing | Unfrosted layers or frosted whole cake | Up to 2–3 months |
For short-term storage, room temp works well—especially if your kitchen isn’t too warm. Simply cover the cake with a dome or wrap it loosely in plastic to prevent drying out.
But if your salted chocolate cake has cream, fruit, or cream cheese-based toppings, refrigeration is safer. Be sure to let the cake come to room temp before serving, as cold temperatures can mute chocolate flavor.
How Long Does Chocolate Cake Stay Fresh?
If stored correctly, your salted chocolate cake can taste just as delicious on day four as it did on day one.
Here’s how to maximize freshness:
- For unfrosted layers, wrap each one tightly in plastic wrap followed by a layer of foil to preserve freshness and prevent freezer burn.. Freeze or refrigerate as needed.
- Frosted Cake – Place in a cake keeper or loosely tent foil over the top. Keep frosting from touching wraps or covers to avoid smudging and maintain a clean, polished finish.
- Individual Slices – Wrap in plastic and store in a sealed container. This is ideal for grab-and-go portions.
To revive slightly dry slices, microwave for 10–12 seconds or warm gently in the oven. The chocolate will soften, and any ganache or caramel will turn delightfully gooey again.
Looking for a make-ahead-friendly dessert with staying power? Don’t miss our tiramisu cake, which actually tastes better the next day.
Salted Chocolate Cake Variations to Try
While the classic salted chocolate cake is a crowd favorite, there’s no rule that says you can’t get creative. Whether you’re baking for dietary restrictions or looking to mix up your dessert game, these variations add fun twists without sacrificing flavor.
Gluten-Free and Vegan Options
You don’t need traditional flour or dairy to create a rich, indulgent salted chocolate cake. Here’s how to adapt your recipe to fit gluten-free and vegan diets.
Gluten-Free Version
- Flour: Use a 1:1 gluten-free baking blend with xanthan gum for structure. Avoid single flours like almond or coconut alone, which can make the cake gritty or dry.
- Tips: Add an extra egg or use applesauce to help with binding, and let the batter rest for 10 minutes before baking to reduce gumminess.
Vegan Version
- Eggs: Replace with flax eggs (1 tbsp flaxseed + 3 tbsp water per egg).
- Dairy: Use almond milk with 1 tbsp vinegar as a buttermilk substitute, and swap butter for coconut oil or vegan margarine.
- Ganache: Make vegan ganache using full-fat coconut milk and dark chocolate without milk solids.
These variations maintain the cake’s luscious texture and let the rich chocolate and sea salt flavors shine.
Want more bold dessert ideas without gluten? Don’t miss our rich dubai chocolate recipe—a spiced, luxurious twist for chocolate lovers.
Mini Cakes, Cupcakes, and Mug Versions
Sometimes a full-sized cake isn’t what you need. Here’s how to scale it down without compromising taste:
| Mini Dessert | How to Adapt | Baking Time |
|---|---|---|
| Cupcakes | Divide batter into lined muffin tins | 18–22 minutes |
| Mini Cakes | Use 4-inch pans for personal-sized cakes | 20–25 minutes |
| Mug Cakes | Use ¼ of the recipe in a microwave-safe mug | 1–1½ minutes (microwave) |
Top each version with a dollop of ganache and a sprinkle of flaky salt for instant salted chocolate magic—perfect for parties, gifts, or midnight snacks.
Whether you’re baking for dietary needs or just having fun in the kitchen, there’s a salted chocolate cake variation for every occasion.
Serving and Pairing Ideas for Salted Chocolate Cake
A perfect salted chocolate cake isn’t just about baking—it’s about the full experience. From how you slice and plate the cake to what you serve it with, small choices can turn your dessert into a memorable event.
Perfect Drinks to Serve With It
Pairing a drink with salted chocolate cake enhances its richness and helps balance the intense chocolate flavor. Here are the top drink options depending on the vibe you’re going for:
| Drink | Why It Works | Occasion |
|---|---|---|
| Red Wine (Cabernet, Merlot) | Complements chocolate’s richness and salt | Dinner parties |
| Espresso or Dark Roast Coffee | Cuts through sweetness with bold flavor | Dessert or afternoon treat |
| Milk (Whole or Almond) | Neutralizes richness, classic combo | Family gatherings |
| Port or Dessert Wine | Amplifies sweetness, smooth finish | Holiday meals |
For an upscale touch, add a small glass of cherry or raspberry liqueur—a natural pairing for dark chocolate and salt.
Creative Plating Tips for Special Occasions
Plating is presentation—and presentation counts. Here are a few techniques to make your cake stand out without turning your kitchen into a restaurant:
- Offset Layers: Slightly stagger stacked layers for a modern look.
- Salt Art: Use flaky sea salt and edible flowers or cocoa powder to create visual texture.
- Syrup Swirls: Swirl ganache or salted caramel on the plate beneath the slice.
- Texture Play: Add chocolate curls or crushed hazelnuts for bite.
- Minimalist Garnish: A clean slice with a raspberry and mint leaf is simple but elegant.
Use a hot knife to slice your cake cleanly and wipe between cuts for sharp, bakery-style servings.
Don’t miss our creative dessert layering techniques in this chocolate raspberry cake for more visual inspiration.
With these serving and pairing tips, your salted chocolate cake goes from great to gourmet—every slice a decadent moment.
Conclusion
From flavor-packed ingredients to storage tips and beautiful plating, a salted chocolate cake is more than just a dessert—it’s an experience. Whether you’re making a simple weeknight treat or a show-stopping celebration cake, the balance of rich cocoa and a hint of sea salt creates a flavor combination that never fails to impress.
With this complete guide, you’re ready to bake a cake that’s not only moist and indulgent but also beautifully finished and easy to store. Experiment with the variations, keep the techniques in mind, and don’t be afraid to get creative. Your next cake might just be your best one yet.
Fore more recipes follow me in Facebook, medium and Pinterest
FAQs
What is the purpose of salt in a cake?
Salt may seem like a background player, but it’s essential. In a salted chocolate cake, salt enhances the sweetness and richness of the chocolate. It sharpens flavors and creates balance, preventing the cake from tasting flat or overly sugary. Salt also strengthens the structure of the cake by tightening gluten bonds—helping your cake rise evenly and bake with the right texture.
What makes a chocolate cake super moist?
Several key ingredients and techniques contribute to a moist salted chocolate cake. Buttermilk or sour cream adds fat and acidity, helping tenderize the crumb. Using oil instead of butter retains moisture better over time. Also, hot water or coffee in the batter helps bloom the cocoa and keeps the cake soft. Don’t overbake, and always measure your flour accurately to avoid drying the cake out.
Why does chocolate sink in cakes?
If you add chocolate chips or chunks to your batter and they all end up at the bottom, it’s usually because the batter is too thin or the pieces are too heavy. The fix? Toss the chocolate pieces in a little flour before folding them into the batter. Also, letting the batter rest for a few minutes before baking can help thicken it slightly, keeping mix-ins from sinking.
How long will chocolate cake last?
When stored correctly, a salted chocolate cake can stay fresh and delicious for several days. At room temperature, it lasts about 2–3 days when covered properly. In the fridge, it can last up to 5–6 days. You can also freeze it for up to 3 months. Always allow chilled or frozen cake to come to room temperature before serving to enjoy its full flavor and texture.